Simple and Daring

Strengthening the experience one inspiration at a time.

Dropping your shoulders down your back…and why you should attend Alison West’s class

I am grateful that almost every year, my travel schedule takes me to New York City (more on this great city in future posts). And every year, I try to take advantage of being in a city of amazing yoga teachers and students by attending as many classes as possible.

This trip, I had high hopes of writing a NYC Yoga Roundup for you, but instead I learned two important things:

1. Many yoga teachers take time in April off for a spring break, so call or email ahead to see if the teachers you are hoping to see will be having class. And don’t be surprised if they aren’t, as I am. Every year.

2. Being held captive in your hotel room due to illness doesn’t go well with the plan of practicing a lot of yoga.

To the latter point, I was able to get one class in prior to my illness, it was the Teacher’s Class taught by Alison West at Yoga Union. Alison is the Director of Yoga Union and has an incredible background. She was recently named one of the most influential yoga teachers in America and is worth practicing with…if you pass the test 🙂 (If you plan to take the Teacher’s Class, you have to be given permission by Alison to attend, and she is understandably picky about who is let in.)

The particular class I attended focused on Shoulders. Reach, extend, but whatever you do, don’t drop your shoulders down your back. Shoulders back is a cue that I’ve heard from many teachers since I started practicing yoga so it was hard for me to avoid doing this (and boy, did Alison remind me of this all throughout class). Given that many of us spend the majority of our day hunched over a computer (shoulders protracted), it seems logical to me that shoulders back (retracted) is a good way to counter this ‘bad posture.’ To over-simplify Alison’s reasoning, it’s about extension and over time shoulders down and back becomes bad for your lower back. As somebody who already deals with lower back pain (hello, 80% of adults), I thought it would be wise to listen.

Decoupling shoulder and spinal movement
If shoulders down and back is a cue you’re used to hearing or teaching, fear not, it’s not totally wrong. The devil is in the details. For many of us, when we send our shoulders down and back we also send our spine into a slight backbend. That is, at the same time we’re moving our shoulders, we’re extending the spine. You may be able to notice this – as your lower ribs jet out and chest lifts. Other issues this could cause include a lower quality of breath and tension in the mid to upper spine, which you can learn more about here.
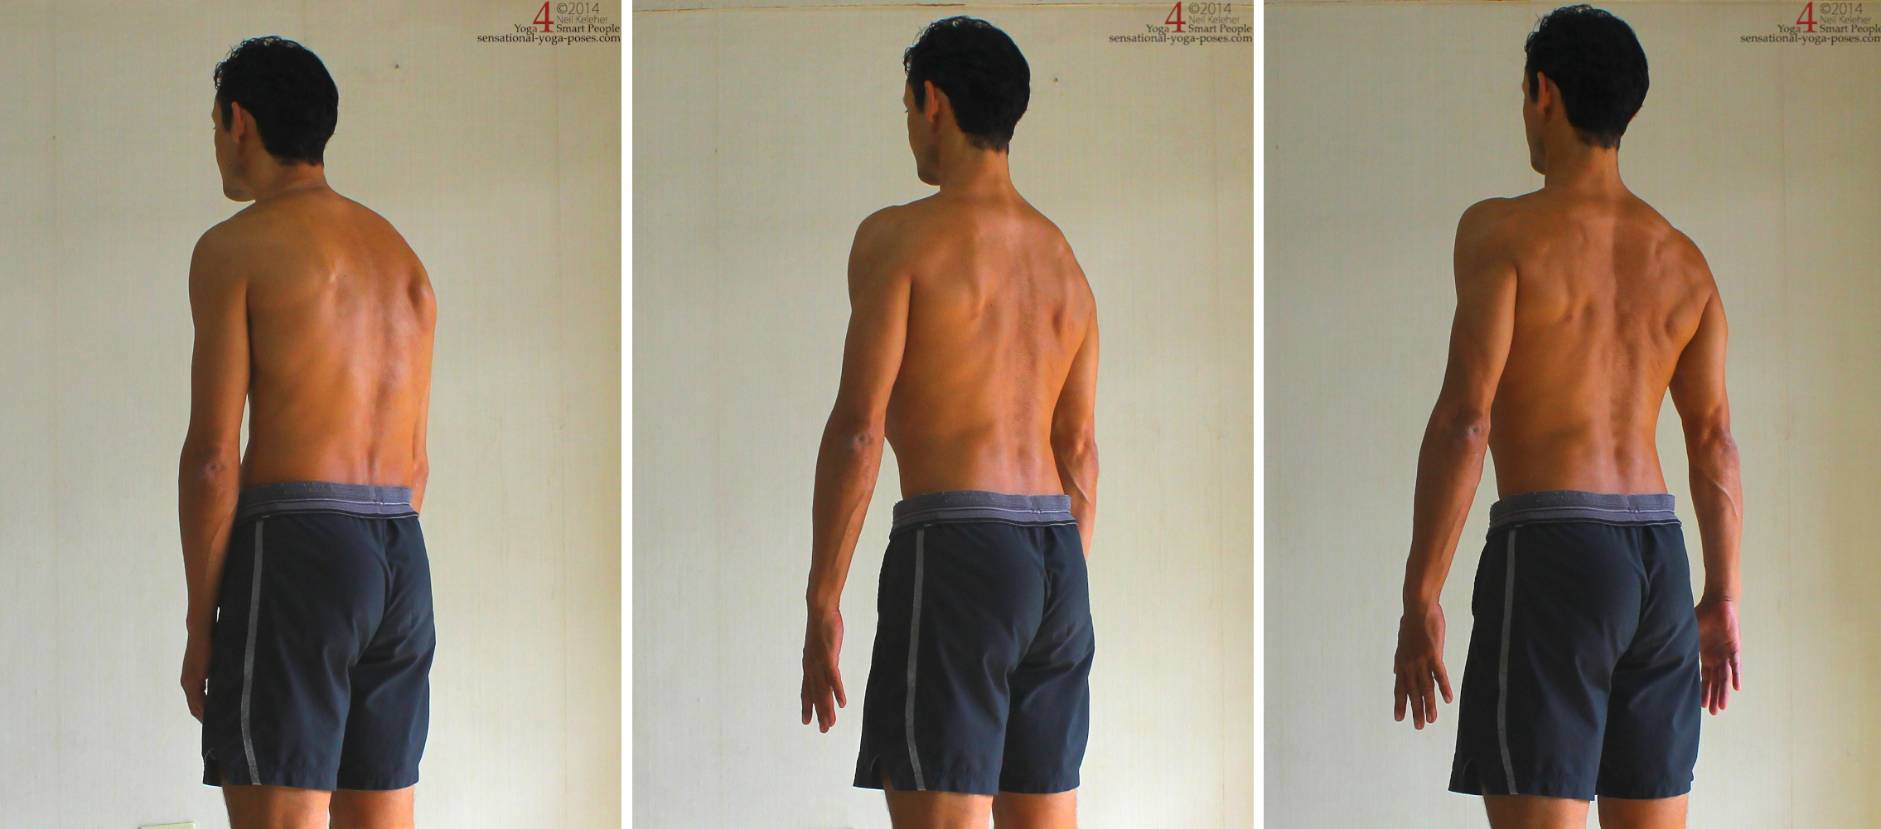
Shoulders down and back. Posture. Yoga.So how do you fix this?
Instead of shoulders down and back, relax the shoulders. And over time target the tension pulling them forward. Practice moving the shoulders aside from moving the spine.

It’s not easy, but over time you will notice the difference – especially in poses like handstand and forearm stand. And long term, you will avoid lower back pain, which alone is worth it!
3 Tips for Running When You Don’t Have All of Your Gear

Tips for running without gear

It’s happened to many of us. You’re out of town on a quick business trip (or otherwise) and you suddenly find some extra time on your hands. (Yay for work days that end early!) You’d happily go sightseeing if you were in a big city, but you’re not. You’re in the suburbs of a big city (thank you Corporate for saving a few dollars to locate in an office park in the suburbs instead of the *actual* city nearby). It’s nice out and you’re antsy to go for a run…one problem…you didn’t bring your normal running gear. You loathe the idea of staying in and watching bad hotel cable. We all know how that goes – the Menu/Guide you have to exit out of *every time* you turn on the TV, the latency you get switching channels with the remote (why are hotel TVs SO SLOW?), the 4 news networks you have to chose from – but no movie channels…

Let’s be honest, the best thing to do for a workout in this case is to get your heart rate up with a HIIT workout in your room, then go out and take in some fresh air on a brisk walk.

Assuming you have at least an adequate pair of rubber soled shoes (think street shoes or ortho sandles), here are 3 trips to get your run on before heading out to the Applebee’s on the other side of the hotel parking lot for dinner.

Caveat: the following assumes you have experience running and know you’re body’s limits. Take care of yourself and use these tips at your own risk.


Don’t worry about what you look like

The key here is to find the best material for running available in your suitcase. Nylon and poylyester are best. Cotton, though less breathable, if fine too. Yes, this means you may be running in that blouse you just paired with your pencil skirt and heels, but that’s what dry cleaners are for!


Run on softer surfaces

Running shoes are designed to absorb shock. Without them that shock is absorbed by your feet, legs, knees, rest of body… not great. So instead of the roads and sidewalk, stick to grass, dirt, or any other softer surface. This also makes your muscles tire faster which means less time before you get to hang out at Applebee’s


Take it slow

This is one of times you can happily claim you’re not “in it to win it.” The idea here is to get your heart rate up…enough, see the surroundings, and enjoy the workout. You can always pair your run with a HIIT program in the room, so slow take it slow-er than usual and enjoy the time outside.


And if after reading this you think, “not worth it,” I don’t blame you. Check out Wikitravel to see what gems may be around you to check out.

Stop, Drop, and Yoga. 3 Core Yoga Poses For Minimum Time and Maximum Benefit.

Yoga For Maximum Benefits

Practicing yoga is a great way to burn calories and tone muscles. And as if we need more reasons, it also helps to increase flexibility, improve energy, and maintain a balanced metabolism. But even the thought of going to a yoga class can be a deal killer for some. The time commitment, the “OMs,” the Lululemon. The good news is, you can still get the benefits by practicing a few key poses at home.


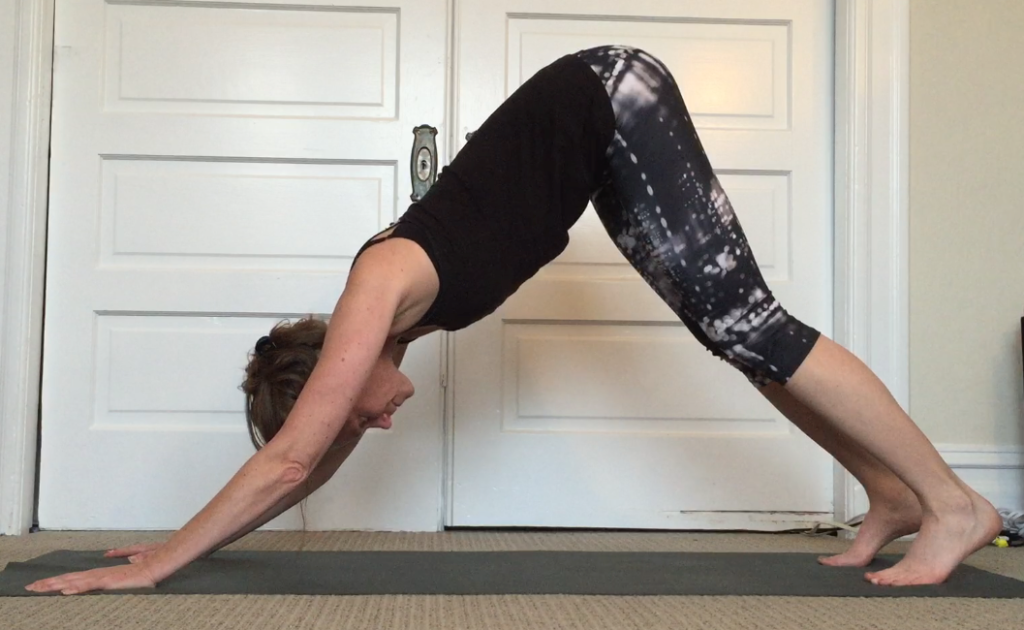
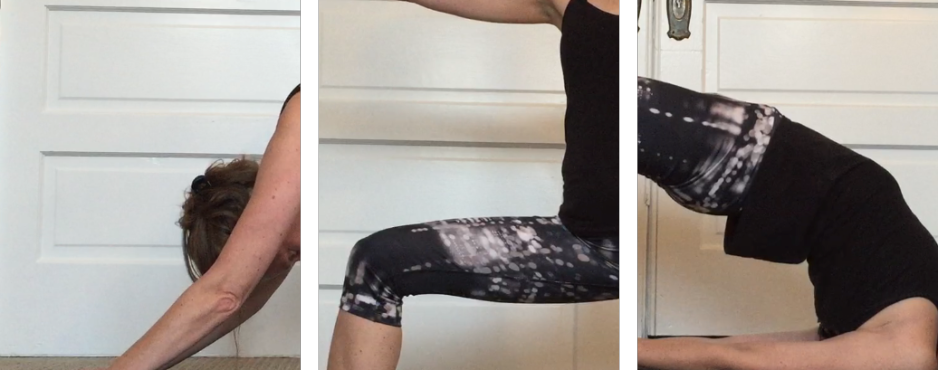
Downward-Facing Dog

Yoga Downward Facing Dog
For those with tight hamstrings, knees can be bent and heels lifted. A folded blanket or rolled up mat can be placed under heels to support.

Also known as: Adho Mukha Svanasana
Key benefits: Strengthens arms, shoulders, wrists, and ankles. Stretches calves, hamstrings, arches of feet.

Start on your hands and knees (sometimes referred to as table-top pose). Your shoulders should be directly over wrists or slightly forward and hips over knees. Spread the fingers and toes wide. Inhale here as you pull the pelvis up and in, waving the inner and outer spine long.

From here, press into the hands as you knees, sending your hips up and back. Keep the knees bent as you set the foundation for this pose. Press through the hands, especially the inner forefinger and thumb. Externally rotate the upper arms sending the shoulder blades down and back. Shoulders out of ears.

Engage your quadriceps as you roll the upper thighs slightly inward. Press through the feet, sending the heels back and down.

Keeping this foundation with your arms and legs, pull the belly towards the spine. Lengthen the spine. Keep head between arms – do not let it dangle towards the floor. Stay here for 5 – 10 long and deep breaths. When you’re finished, brings the knees back to the floor and rest in Child’s Pose.


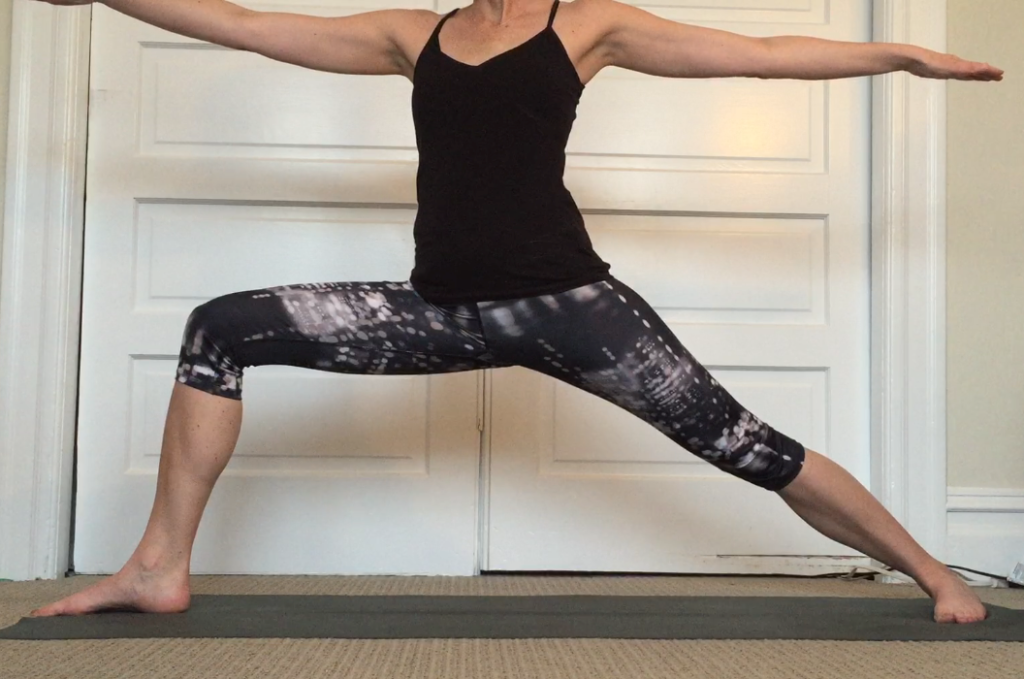
Warrior II

Yoga Warrior II

Also known as: Virabhadrasana II
Key benefits: Strengthens legs, arches of feet. Stretches inner and outer hips, groin, and shoulders.

Begin by jumping the feet 3-4 feet apart so they align with wrists when arms are outstretched. Turn the front foot 90 degrees (perpendicular to the front of your mat) and turn your back foot in slightly (roughly 45 degree angle). Engage the inner thigh and bend the front knee so it’s directly over or slightly behind the ankle (but never in front of the ankle) bringing your front thigh parallel to the floor.

Spread the toes and press through the outer back foot as you lift the inner arch. Look down at your front knee, it should be facing your second and third toes – do not let it collapse in.

Extend the arms, hands facing down, sending the shoulder blades down and back. Keep your shoulders out of your ears. Extend the sides of the waist and lengthen the spine. Turn your gaze towards the fingers of your front hand. Stay here for 5-10 breaths.


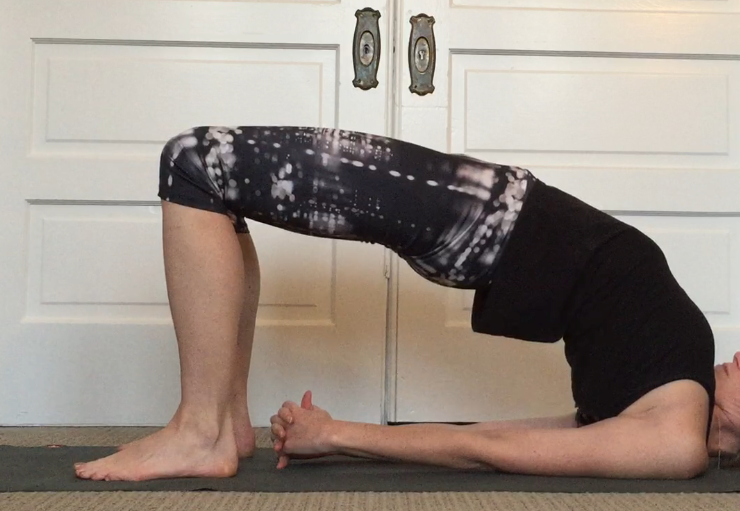
Bridge Pose

Yoga Bridge Pose

Also known as: Setu Bandha Sarvangasana
Key benefits: Strengthens quadriceps, back, and hamstrings. Stretches shoulders, chest, and hips.

Start by laying on your back hands down your sides. Bring your feet towards your buttocks close enough to just brush the tips of your fingers.

Press down through all four corners of your feet as you left the hips bringing your thighs parallel to the floor. Engage the legs and buttocks. Roll your shoulders down and back and open the chest, spreading the collarbone wide. Keep your gaze upward, do not turn your head.

As you continue pressing through the feet, extend the tailbone toward the backs of your knees. Lift your pelvis in and up, bringing naval towards spine.

You can stay here, or clasp your hands beneath you. If you’re hands are clasped, press through the clasped hands and arms to continue to open the chest.

Stay here for 5-10 breaths then slowly lower back down. Hug your knees to your chest and give yourself a massage by rolling side to side.